What is Managed DNS for?
If you would like to manage your DNS at Nine Planets, but do not have a hosting account, you can activate Managed DNS.
If you do have a hosting account, here you can manage your DNS using the hosting control panel.
How do I activate Managed DNS?
First, log into the Client Area. Click on the Domains button at the top, and then on the row for the domain you want to edit (just the row, not the domain name itself). From the left menu on that page click on Addons.
Step 1: Activate Managed DNS
To activate Managed DNS, click the Buy Now button for DNS Host Record Management. We don't charge for this, but you need to click the button to activate it.
Step 2: Set Nameservers
Now go back to the page for your domain again, and from the left menu click on Nameserver. On this screen you will want to set the first three boxes with these:
ns1.systemdns.com
ns2.systemdns.com
ns3.systemdns.com
Now click the Change Nameservers button.
NOTE! The changes may take up to 24 hours to show up, meaning your website and email may be inaccessible while the changes are going into effect.
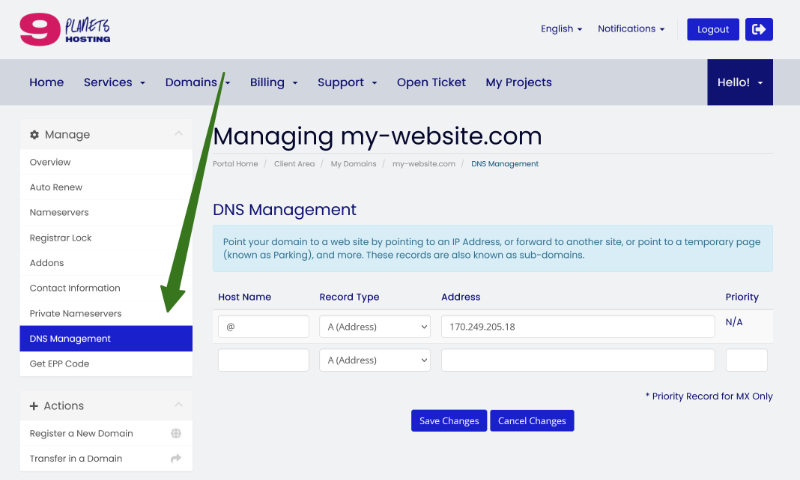
Editing DNS with Managed DNS
Once Managed DNS is active, you can edit the DNS records for you domain by clicking on the DNS Management button: